

Why Do Dark Full-Bleed Matte Laminates Discolor and Bubble?
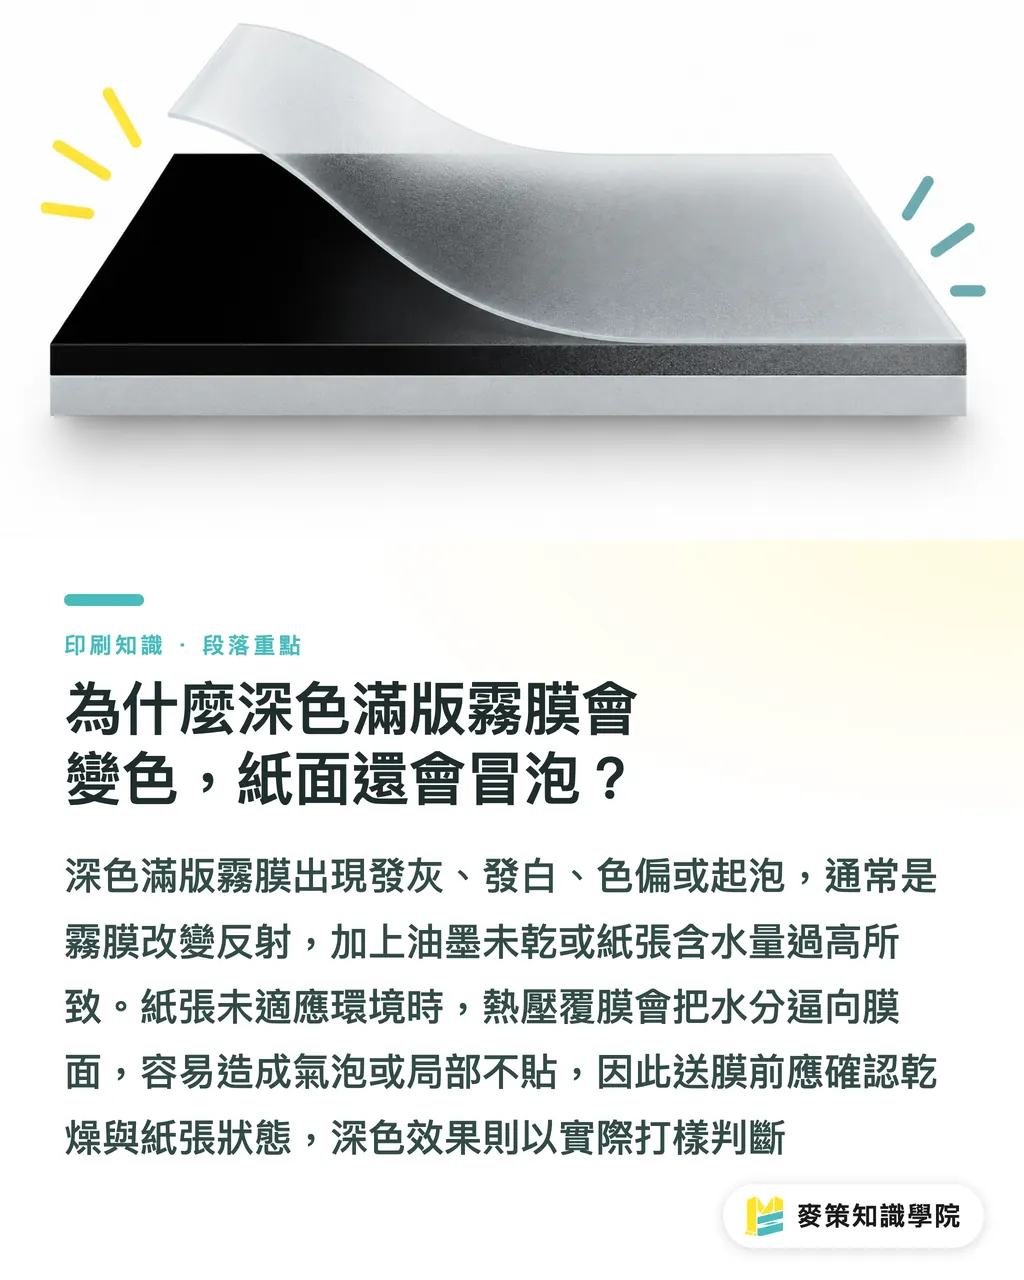
Dark full-bleed matte laminates discolor or bubble for two common reasons: the surface reflection changes, and the ink isn't fully dry or the paper carries too much moisture. Lamination is the process of heat-pressing a BOPP or PET film onto a printed sheet after printing, it protects the surface, changes the feel, and affects later writing and finishing
・Landmine 1, dark full-bleed under matte laminate: that deep black on screen may look gray, washed out, or off-color on the finished piece. Matte film changes how light reflects, and heavy ink coverage across a full bleed means any incomplete drying will amplify the color shift
・Landmine 2, paper with too much moisture: after heat pressing, the film surface develops bubbles or patches that won't adhere. If the paper hasn't acclimatized to the print shop's environment, moisture drives outward into the film under heat
There's nothing in a PDF that fixes wet paper. Before laminating, confirm total ink coverage, ink drying status, and paper condition with the printer. For color shifts from matte laminate, judge by an actual press proof
・When paper moisture is high, let it acclimatize to the shop environment first, then schedule lamination
・When the finished piece has already gone gray, identify whether the cause is paper, drying, or film before doing anything else. Adding another layer of film usually won't fix a color shift
Why Does Spot UV Bleed Past the Edge of Matte Laminate?
Spot UV bleeds past matte laminate edges because the coating boundary, registration tolerance, and the contrast between UV and matte finishes all amplify the edge at the same time. Spot UV is a process where UV coating is applied only to specified areas, making those spots shinier and more tactile than the surrounding matte film
When fine text, hairline borders, or small icons sit on a dark matte background, even a slight shift in registration makes the bright coating appear to bleed past the edge, and fine details get muddy
・Landmine 3, spot UV hugging important details: if the UV border presses against fine text or hairlines, registration tolerance takes out the finest elements first
・Keep the UV layer separately named, and mark it with the designated spot color or a separate plate as the printer specifies. Verbal instructions alone won't do
・Don't place important artwork right at the spot UV boundary. Mark the boundary clearly on the proof
・Review matte film and spot UV together on actual strike-offs. Don't use screen brightness differences as a stand-in for finished results
Different printers handle registration and coating boundaries differently. Don't apply a one-size-fits-all millimeter clearance on your own, hand the boundary positions and key artwork over to the printer to confirm
Why Can't You Write or Stamp on a Laminated Surface?
You can't write or stamp directly on a laminated surface because the film replaces the paper's absorbent, ink-grabbing top layer. Matte laminate looks non-reflective, but that doesn't mean pen ink will adhere to it
・Landmine 4, full lamination on the back of business cards, hang tags, or event cards: in actual use, pens may slide, stamps may not dry, or ink coverage may be uneven
・For areas that need handwriting, stamping, or overprinting later, keep those areas unlaminated when building the file, or specify a writable surface and test it with the actual pen or ink being used
・Mark the laminated zone and the writable zone as separate areas on the layout so the printer can see them on the finishing proof
・Test with the actual pen, stamp, or ink the finished piece will use. Don't draw conclusions by touching the matte surface with your finger
Matte laminate is not paper
Different Film on Each Side or Unusual Shapes: How to Avoid Warping and Die Marks?
Using different films on each side raises the risk of warping from uneven shrinkage and tension. Unusual shapes can leave tool marks at die cuts, score lines, or corners
・Landmine 5, gloss on one side and matte on the other, or film on one side only: the two sides pull differently, and the finished piece may curl toward one side, affecting boxing, stacking, and bonding
・Landmine 6, laminating before die cutting on a complex shape: the cutter and score lines concentrate stress at sharp corners, and the film surface may show marks. The more complex the shape, the less you can rely on looking at a flat PDF
・When placing the job, explain the double-sided film configuration, substrate, and finishing sequence all at once. Don't wait until film output to add details
・Keep die-cut files, print files, and spot UV layers separate, and mark score lines, fold lines, and areas where marks must not appear
・For unusual shapes, make a laminated strike-off first to check for warping, corners, and tool marks before committing to a production run
For mid-to-high-end custom jobs that combine double-sided film, spot UV, and die cutting, pass the layered files and a usage description to MINDS. Ask the printer to write the finishing sequence and acceptance criteria clearly on the proof approval form
What Should You Check Before Sending to Lamination?
A pre-lamination self-check should pull film type, print condition, finishing registration, and end use onto a single job order or submission note. I've distilled this into three steps using Mai Strategy's three-checkpoint submission process
・① Materials check: specify gloss, matte, or soft-touch film; confirm the warping risk for dark full-bleeds, paper drying, and double-sided film
・② Finishing check: separate spot UV, film edges, die cuts, and score lines by layer; ask how proofing works for registration and unusual shapes
・③ End-use check: mark areas for handwriting, stamping, or overprinting; confirm which zones must keep exposed paper
Before submitting, go through the checklist:
・Has dark full-bleed coverage been confirmed against film type, proof results, and ink drying?
・Is paper moisture suitable for lamination? Are UV boundaries and fine text kept clear of each other?
・Are there any double-sided films, unusual die cuts, or writable zones, and have they all been written into the production notes?

Key Takeaways
・Matte laminate changes how dark colors look. Don't use screen black to predict what the finished black will be
・If paper moisture and ink drying haven't been confirmed, bubbles and color shifts will show up together after heat pressing
・Spot UV, film edges, and die cuts all need to be submitted as separate layers. Every attractive effect has a finishing boundary
・Handwriting, double-sided film, or unusual shapes must be discussed before quoting and proofing
Further Thinking
Printers can make film type, paper condition, UV plates, double-sided finishing, and die-cut specifications required fields on the job order. Design teams should name print, lamination, UV, and die-cut layers separately, and run through the three checkpoints before submitting. When adding AI or SaaS to the process, preflight shouldn't just check dimensions and bleed, it should also require fields for film type, writeability, double-sided configuration, and unusual shapes, so risks surface before the PDF goes out and printers can trace issues back through the same record. The next step is turning those six landmines into a single submission checklist, and starting to use it on the next job
FAQ
- Does dark full-bleed coverage always rule out matte laminate?
- Not necessarily, but you need to confirm paper condition, ink drying, and film compatibility first, then use an actual proof to check whether the dark areas go gray or shift color
- Can you write or stamp directly on matte laminate?
- Standard matte laminate shouldn't be treated as a writable surface. If business cards, hang tags, or event cards need handwriting, leave unlaminated areas and test with the actual pen or ink
- How do you submit spot UV and matte laminate together?
- Keep spot UV on its own layer or designate it with a spot color per the printer's spec, mark the boundary clearly, and keep fine text and hairlines away from the edge
- Does different film on each side always cause warping?
- Not always, but mismatched films increase the risk of uneven tension. Confirm substrate and finishing sequence together at the quoting and proofing stage
- How do you prevent tool marks when laminating unusual shapes?
- Keep print files, film layers, and die-cut files on separate marked-up layers. For unusual shapes, make a laminated strike-off first to check sharp corners, score lines, and curves before going to production
Related articles



The Print × AI weekly
The print and AI know-how designers, brands and enterprises can use before they commit — one email, every week
MINDS Free Tools
Spine width and imposition calculators — skip the manual math, free in your browser.
MINDS Group
Need actual printing or gifting services?
From premium printing to online ordering and festive gifts — the MINDS Group sister brands take it from here.